The Project Diversifies - Week # 3
- Randy, Panzerfabrik
- Nov 25, 2019
- 3 min read

Week #3 of the Panzer IV build, Reproduction Panzer IV ausf. J, found us wrapping up the first mini-phase and we began diversifying to a broadened range of objectives. First we welded up the hull floor and sidewalls. The associated original Panzer IV pattern pieces were put away. And a good portion of the week was spent on new and exciting mini-phases.
If you have missed our progress prior [CLICK HERE] to see previous progress reports.
We left off last week with the sides placed but they were not fastened. Step one was to attach the sidewalls to the uprights on the table. This ensures that the width of the hull is precisely the correct width. The table is verified straight and square… therefore… so is the hull.

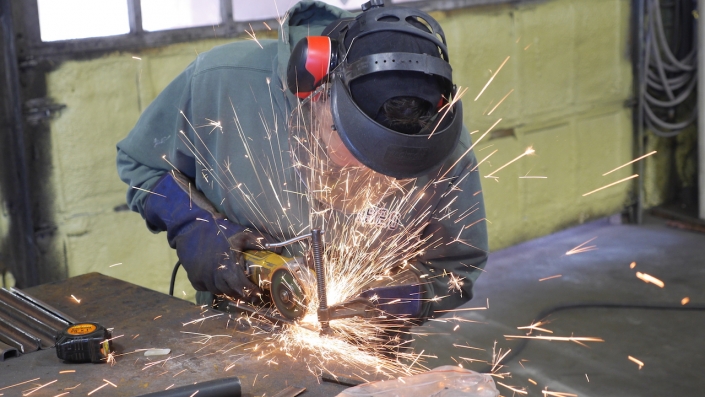
Then it was time to weld. All seams and joints were welded in small steps so that the heat generated wouldn’t turn our beautiful Panzer into a twisted potato chip.
Following are some finished “Glamour Shots”


Now the project splits into multiple directions.

Setting up a functional machine shop has been a bit of a learning curve. I knew what a mill and a lathe were and I knew that they could do cool things. But how? Thank the Panzer gods for Kevin. He has organized a functional machine shop and has gone to work making those cool things.
I will tell you though that the cost of a vintage mill and lathe were just the operation’s down payment.


What engine will we use in our beast? Maybach HL120 TRM? No… I would love to… but… That's crazy. First of all, for practical purposes they don’t exist. Second, if you could get one you would sink more than a fortune into it… and third, on its best day its not as stable as it should be given the cost. In short… If you could find one and could afford it you would think twice before running it. The guys that do this have big huevos. — (Mateuz – Tank Hunter — his Facebook Link at the end).

Alternative: The 1960’s vintage GMC 702 ci. V12 is the ticket. It has the same number of cylinders, roughly the same displacement (bore and stroke), compression, horsepower and torque as the Maybach. It also makes its operating power at roughly the same RPM. The way this reproduction Panzer IV build moves, performs and sounds will be spot on. Can you say “Blubbidy blib blub blubbidy Rummmmm?”
GMC 702 ci V12. Some people inaccurately call it the “Twin 6”. Its not a twin 6. It just has 4 heads instead of 2.
Big Problem though… its too long. These will drop right in a Sturmgeshutz III or Panzer III but the Panzer IV has a shorter engine compartment. Boooo. We’re going to have to do some surgery. “All y’all out there that aspire to build or restore a Panzer IV take good notes. Were gonna show you how to do it.”

Somehow we have to come up with a little over 4 inches and the clutch needs to mount forward up by the gearbox and not back on the engine. A drive shaft will come directly off of the Flywheel.
The first place to harvest some space is the water pump. The fan belt pulleys have to move toward the engine block as far as possible. They need to set adjacent the timing gear cover and the front of the heads.
The giant glob of cast iron that sits in the way is the water pump.
The water pump is integral to the timing gear cover. We need to remove the water pump portion but still retain the cover for the front of the engine.


A third direction we headed this week was to further the upper nose of the hull. This piece needs a lot of detail before installation.

At the two brake access hatches, right and left, the opening has a drip rail gutter. I have been dreading this drip rail because without the press and die to form it, it will be impossible to make other than sculpting it our of a bunch of little pieces.

So… That's what we are going to do… sculpt it out of a bunch of little pieces.


We will probably spend as much time on these drip rails as the hull to this point. Every piece, no matter how big or how small, extracts its toll in time and effort. By next week we should have them done.


Next week is short due to thanksgiving. We will try and finish the rain drip rails and maybe further the nose pieces on the hull
Check out “Tank Hunter” He runs a Maybach HL120 TRM in his restored original Stug III — CLICK HERE —
Until Next Week,
Randy
Panzerfabrik


Comments