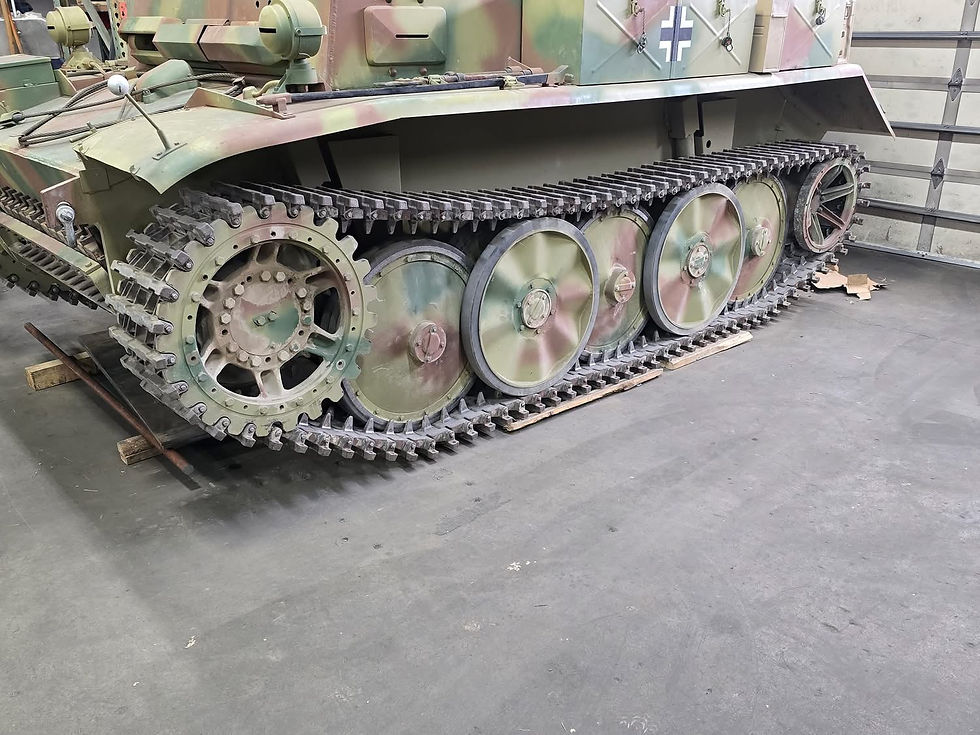
Panzer II “Luchs” - Weeks 17-28
- Randy, Panzerfabrik
- Jun 15, 2025
- 3 min read
Updated: Jul 22, 2025

Week 17 through 28 cont. Feb 24 to May 5th. Here's a picture of the King Tiger.... has nothing to do with our Panzer II Luchs. But... King Tiger. Mike is taking a picture of a couple of the Panzer Farm Desperados as they go for a ride.

Luchs Outer Wheels. These are the iconic wavy outer wheels one first notices on the Panzer II Luchs. We covered pressing the wheels on an earlier post. So... Now comes the process of adding the outer ring that the rubber tire goes on.

That was easy... HA. Actually not bad. The trick is keeping the heat under control and .... a lot of wire goes into each wheel.

Gonna look great when the rubber is on it. Here is ours next to an original. Compare the shape and overall look. I couldn't be happier.

Tad undoing a booboo. As I said, heat... it's the devil. We were very careful to have the wavy part sit overall flat and square in the outer ring

Every now and then we had to convince it to play ball. Here I am persuading the overall plate to lay generally even.

Once in a great while I'll weld just to keep the skills somewhat intact. If you all have been following along, some of the guys have learned to weld using only their mind. I haven't even begun to try. Still have to use a welder and my hands. Sheeesssshhh.

Last post you'll remember that Dave mastered the trick, BUT... it's gotten out of hand. Now he welds stuff without meaning too. To keep him from accidentally mind welding, we keep this bucket on his head most of the time. He's on new medication so hopefully he'll get it under control.

Tad trimming the outer ring to fit nice and continuous.

All of the outers assembled and welded up. I was just in for the glory welding up front. Eddie had to finish it up. Nice job Eddie.

Here were beginning the inner wheels. These get a conical skin over them that has 3 contour, dents in each

They get .75" square stock welded on both sides. Later this will be turned in a lathe to create protective ramps so the track guides don't cut up the rubber.

We threw the idler adjusters on just to trial fit. The tensioning arm isn't installed yet

We used new bearings and seals. Ready for service.

Doc Von Kubel Werks Restorations USA..... Makes the absolute best (perfect) Bosch armored headlights. Just look at these beauties. Whew. pretty.

Exhaust is built for the interior. The flexible section will let the engine vibrate without cracking the steel tubeing. Still have to make the intake manifold.

Time to jump into drive wheels. To make sure we don't screw this up... we pulled one off of Luchs 1.0 to copy.

First chisel cut the wire S fastener that holds the pin in.

Pound out the pin.

And track is broken. Easy Peasy.

These are highly modified Modern German Marder drive wheels.

Here Dave's opening the locking tabs that hold certain bolts secure. Tracked vehicles can shake some bolts out faster than you can say "disaster". They have to be locked down or look for wheels, suspension, and other body parts start falling off.

The Marder wheels have to be narrowed. So we take off the back side bolt pattern and the front.

This leaves a good portion of the wheel body as waste. You can see the front portion that we will use and the section that will be discarded.

Waiting patiently to be made into something useful.

Here is the backside that carries the bolt pattern for the sprockets.

Raw pieces heading off to the machine shop to be detailed into the sprockets and the beefy piece that joins the inner and outer sections of the ex-Marder wheel.


Comments